The temperature project

Anyone who knits, crochets or crafts in general I guess, will have heard of this. The basic premise is that you work a colour of a project every day for a year based on that days temperature.

Lots of people do blankets, so many rows per day, others do scarves and I’ve recently seen beautiful embroidered trees with one leaf per day.

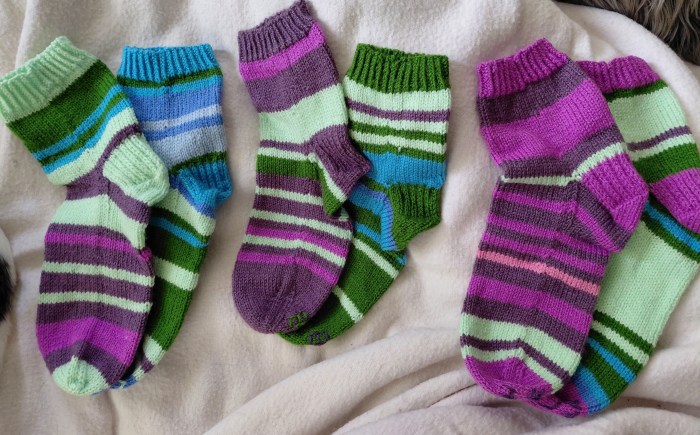
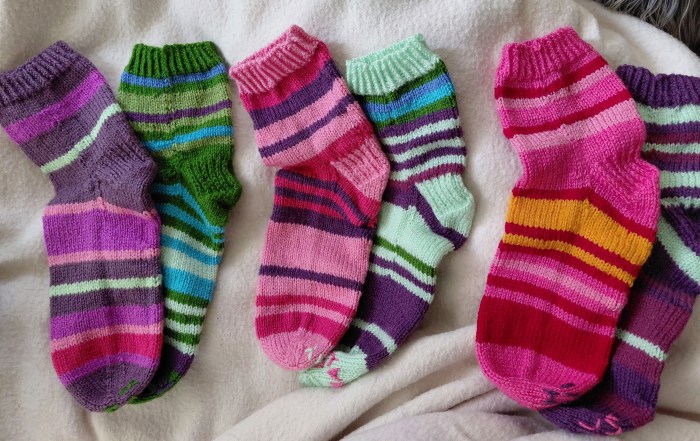
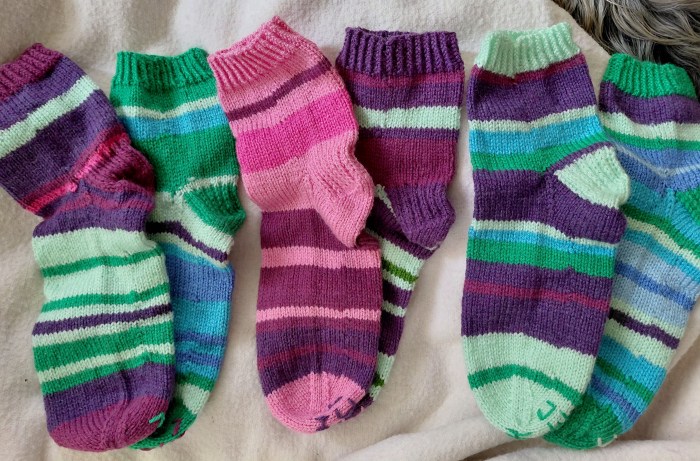
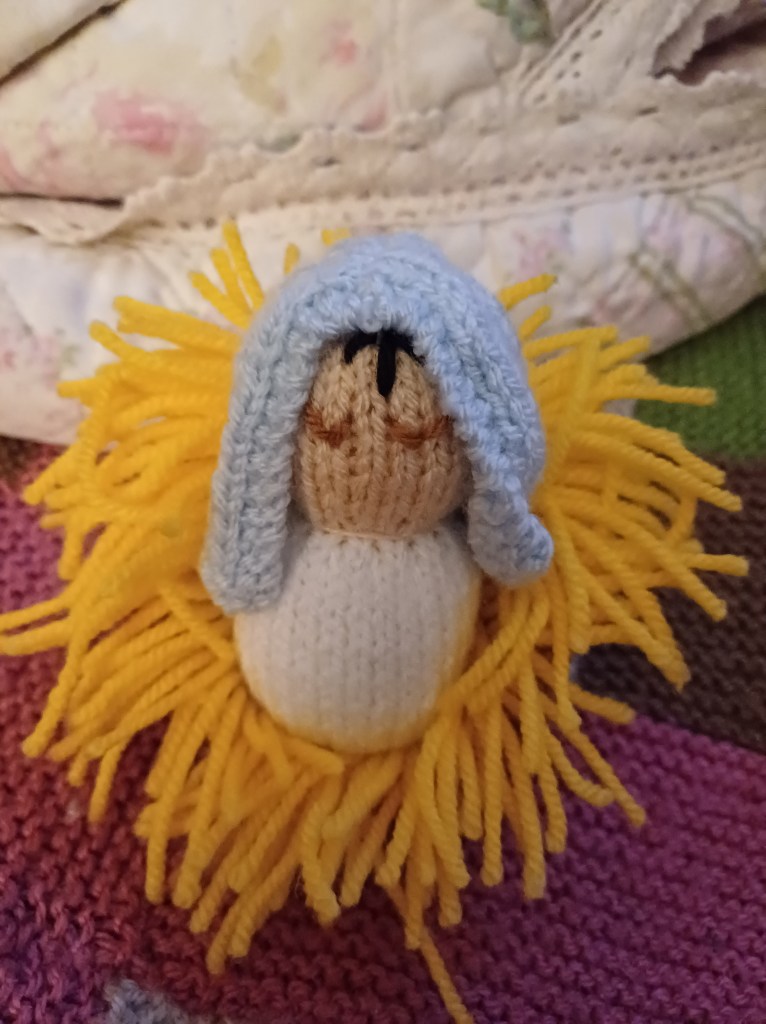
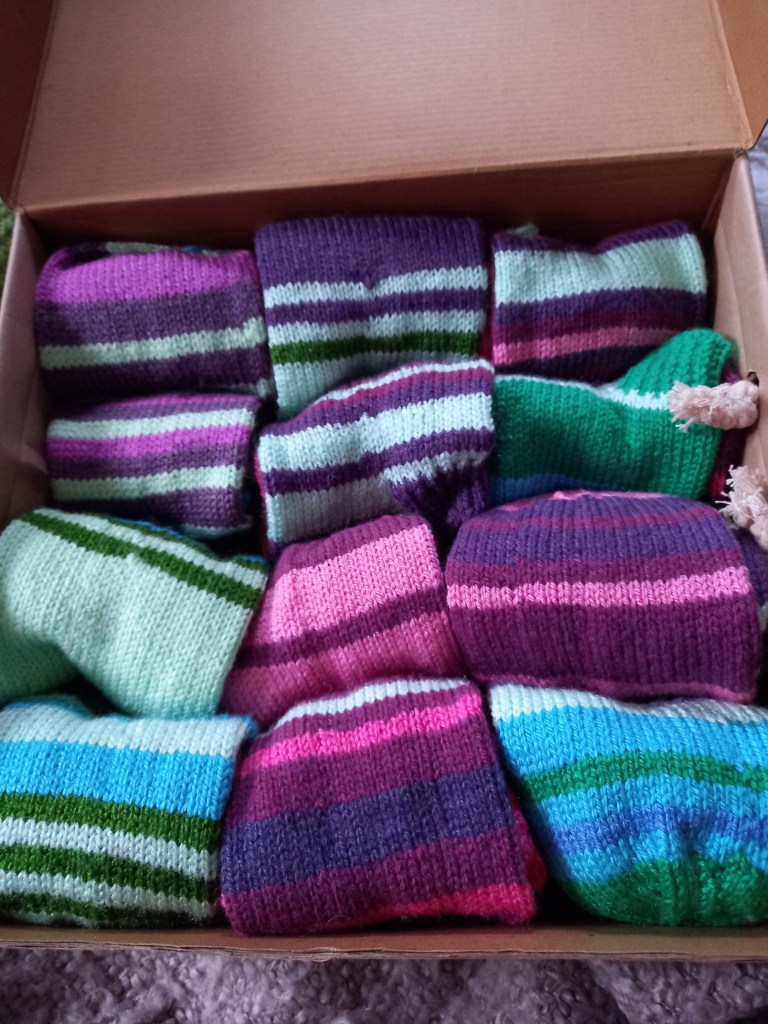
Having made a scarf, then a blanket I decided to venture further to socks!. One pair a month for 12 months. I then decided to use my year if birth.

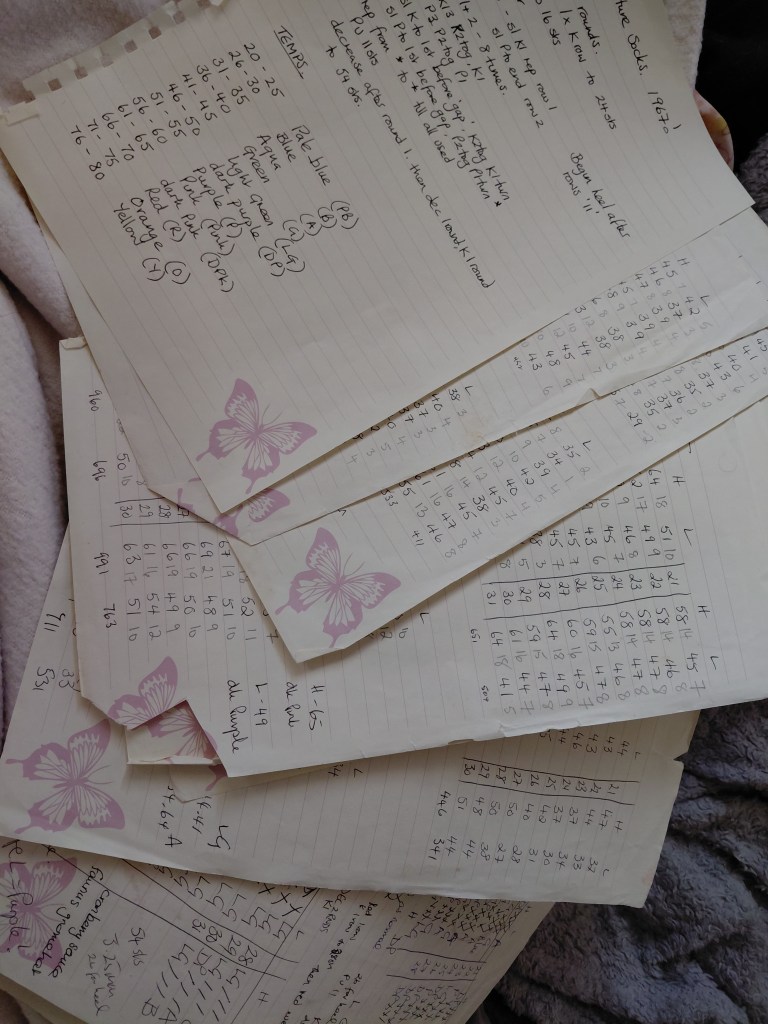
Sounds simple on the face of it, go online, search for the Data(accuweather us great) and off you go. But no not so simple. Just to make me feel old the Data online didn’t go back that far!

What to do.

I decided to email the met office! I was very lucky to have my email land in the inbox of a lady called Joan. She responded that she also couldn’t access electronic data but that she had been down to the archive strongholds and taken photos of all data available for my home town for my chosen year, which she not only sent me but explained what each column was for! What a treasure.

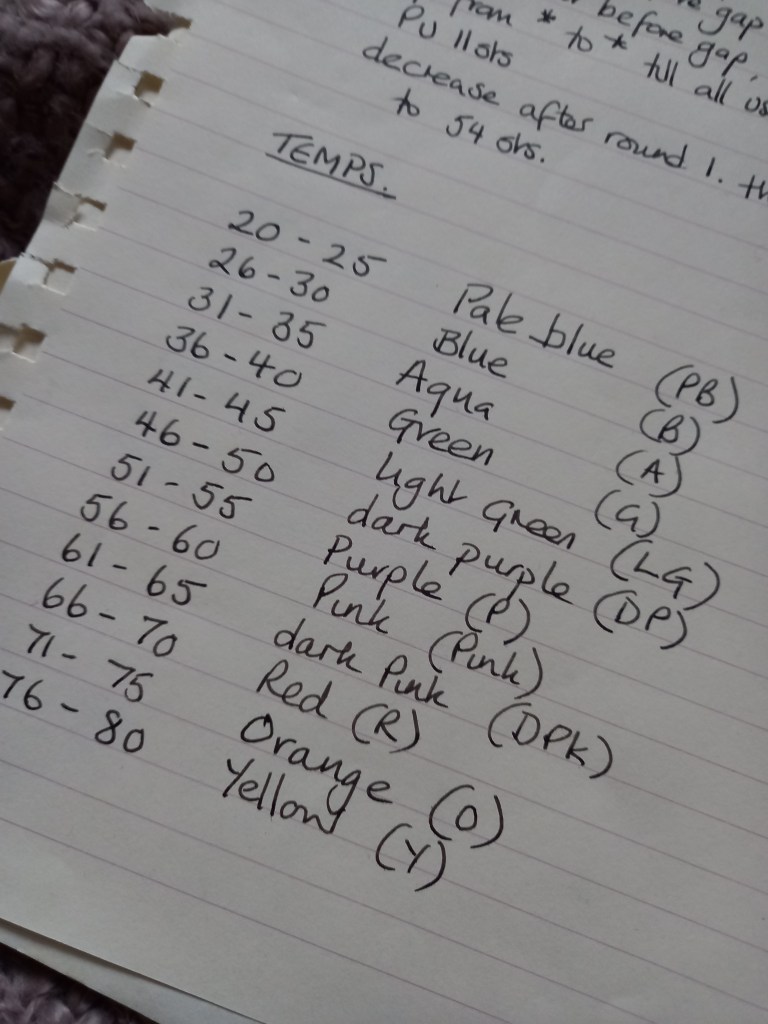
So..now I had my data. I then allocated a colour to a set of temperatures.

• 20-25 – pale blue

• 26-30 – blue

• 31-35 – aqua

• 36-40 – green

• 41-45 – light green

• 46-50 – dark purple

• 51-55 – purple

• 56-60 – pink

• 61-65 – dark pink

• 66-70 – red

• 71-75 – orange

• 76-80 and above – yellow

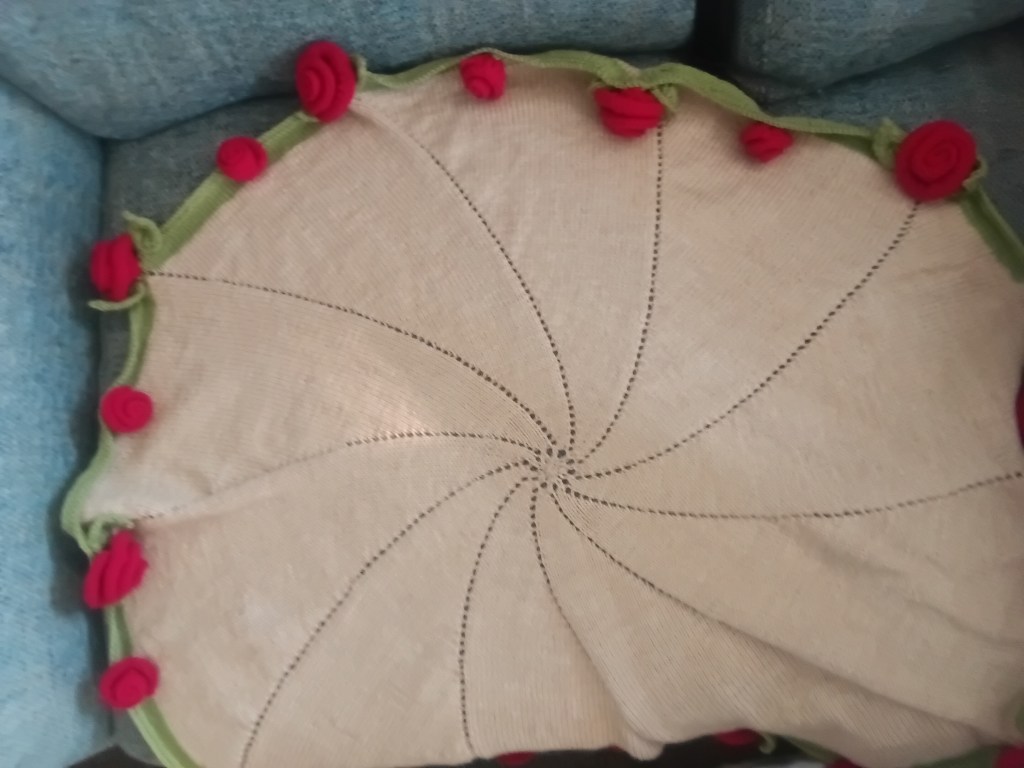
Next job was to work out how many rounds per day, yarn choice, and whether to do identical or fraternal socks. I decided on fraternal, one high temps, one low. I added cuffs, heels and toes in the average high and low respectively.

So my calculations began. Lots of paperwork, lots of maths before I could even start.

This is what I came up with!

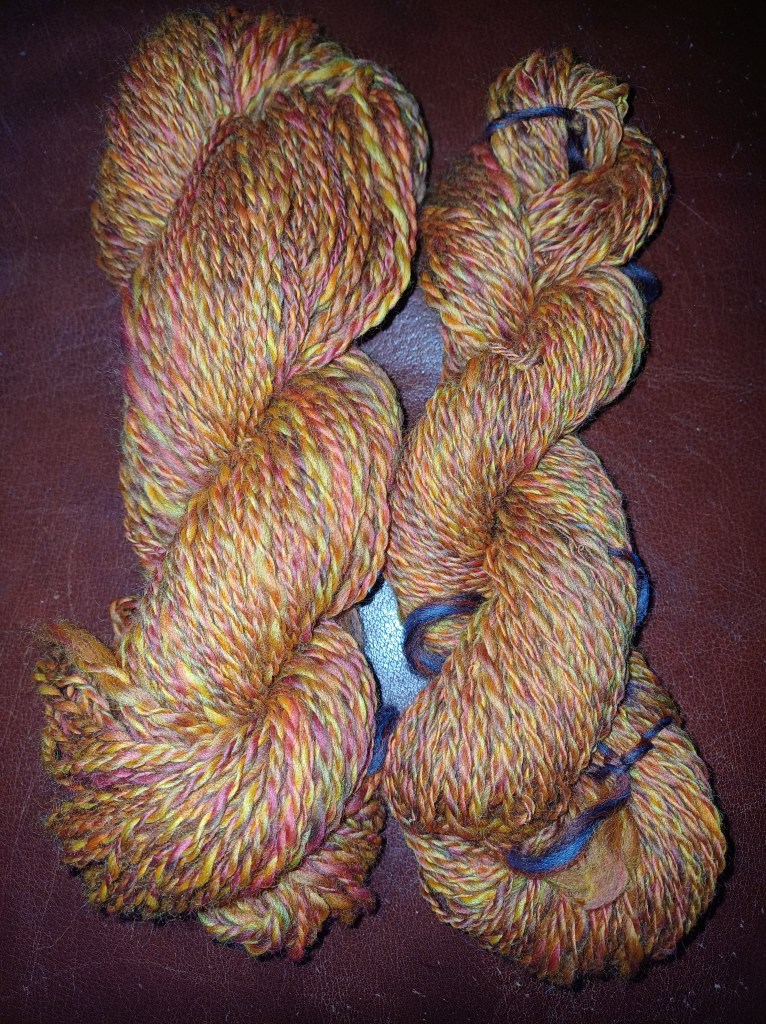
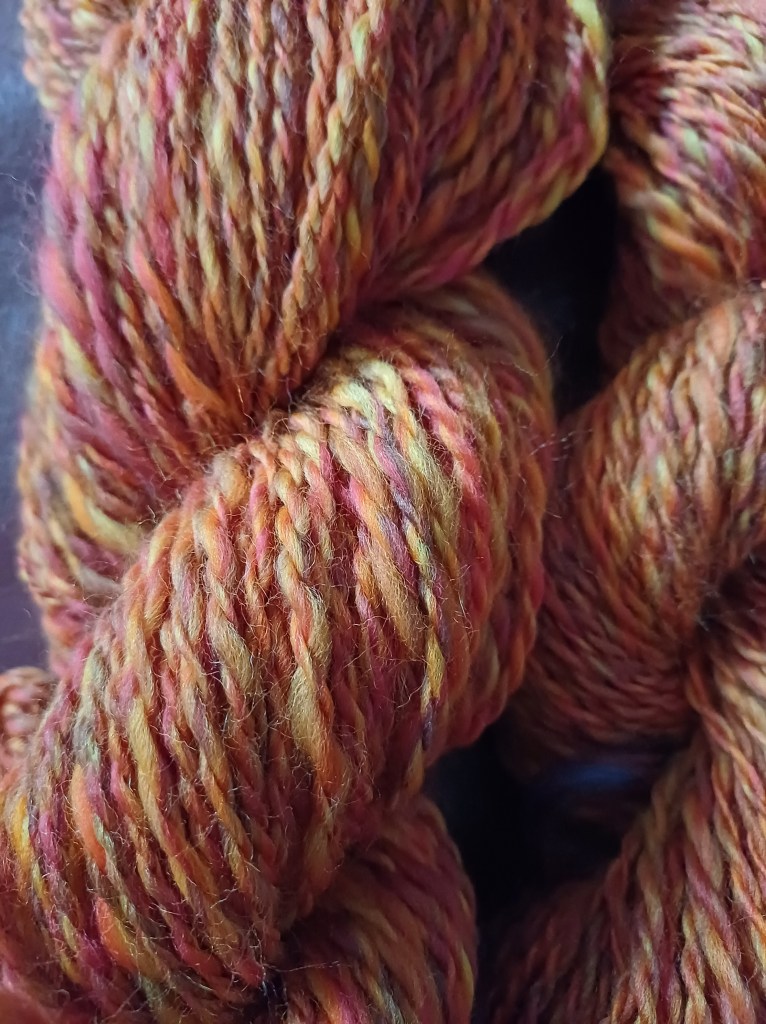
DK yarn – amounts determined by temperature!

3.75 mm dpns or needles of your choice

Cast on 54 sts

CUFF

• k1, p1 rib fir 8 rounds using average temperature (low or high depending where you want to start)

LEG

Knit 3 rounds per day for 10 days

HEEL

work as below, or preferred heel, in high or low temp

Working back and forth on the 26 sts (leave other sts on hold),

row 1. (Slip1, knit1) rep to end

row 2. Slip 1, purl to end

repeat rows 1 & 2 another 4 times making 10 rows in total

next. Slip 1, knit 13, k2tog, turn

next. Slip 1, purl 3, p2tog, p1 turn

**next. Slip1, knit to 1 stitch before the gap that was made, k2tog, k1 turn

next. Slip 1, purl to 1 stitch before the gap, p2tog, p1, turn**

repeat the last 2 rows (from **-**) until all sts have been used. Place a stitch marker in the centre of these sts as this is your new beginning of round.

Now, joining in the next days colour at the beginning of the round, knit to the end of the heel then pick up and knit 11 sts down one side of the heel, knit across the held sts, pick up and knit 11 sts along the other side of the heel to the beginning again.

Assuming you are working on dpns you should have the heel sts plus 11 picked up sts on the first needle, needle 1, 28 sts on needle 2, and the 11 picked up sts plus remaining heel sts on needle 3

DECREASING

round 1. Knit to 3 sts before end of needle 1, k2tog, k1, knit across needle 2, needle 3 k1, k2tog, knit to end of round

round 2. Knit

repeat rounds one and 2 until you have 54 sts again not forgetting to change daily colour where needed.

continue straight working the stripes as required until you come to the end of the month.

for February work 3 rounds in high or low temperature colour before starting on the toe. For months with 30 days work 1 round of toe colour before starting on the toe. For all other months begin working on the toe

TOE

round 1. Needle 1, knit to 3 sts before end of needle, k2tog k1. Needle 2, k1, k2tog, knit to 3 sts before end of needle, k2tog, k1. Needle 3, k1, k2tog, k to end of round

round 2. Knit

rep rounds 1 & 2 to 24 sts the repeat rounds 1 only to 16 sts

kitchener sts together

ROSE BOUQUET BLANKET

It’s finished!

I fell in love with a crochet blanket making the rounds..but I prefer to knit.

I decided to make one, so here’s the pattern for those who, like me, prefer to knit. I’m happy to share this for free but, please credit me with the pattern if you make it.

Thank you

Cate x

You will need

200g dk main colour for the blanket

100g dk green

100g dk flower colour if choice

4mm dpns; 4mm circulars 60cm and 100cm

Pins

Needle for sewing

ABBREVIATIONS

K – knit

P -purl

KFB – knit into the front AND back of the stitch to increase

YO – yarn over

Sts – stitches

PM – place marker

Rep – repeat instructions in the brackets

Sl – slip

K2tog – knit 2 sts together

P2tog – purl 2 sts together

Sl1k2togpsso – slip 1, knit 2 together and pass slipped stitch over

CO – cast on

BO – Bind off

BLANKET

CO 5 sts on dpn and knit one row.

Next: KFB in each st (10 sts)

Join to work in the round placing a marker to mark the beginning of the round

1. (k1, yo) rep to end of round

2. K all sts

3. (k2, yo) rep to end of round

4. k all sts

5. (K3, yo) rep to end of round

6. K all sts

Continue in this way adding 1 stitch to each of the 10 sections. I added a stitch marker after the yo of each section..a very different one to mark the beginning of the round.

When you have too many sts change to circulars as appropriate.

Use up all 200 grammes. It’s likely there will be 400-500 sts by the end!

Now join in the green and continue for around 6 rounds. Work one purl round without increases and then bind off.

FLOWERS

Small – make 10 in red or chosen colour

CO 24 sts

1. sl1, k to end

2 and all alternate rows. Sl1, p to end

3. Sl1 (yo, k1) rep to end

5. Sl1, k to end

7. Sl1, k to end

9. BO

Large – make 10

1. Sl1, k to end

2 and all alternate rows. Sl1, p to end

3. Sl1, (yo, k1) rep to end

5. Sl1. (yo, k1) rep to end

7. Sl1, k to end

9. Sl1, k to end

11. BO

Roll up, the edges will naturally curl over. Using ends fasten off the flower to secure it then stitch to blanket. Place the large ones at the ‘points’ of the blanket where the yous are, the small ones along the edge between

Leaf – make 20 in green

CO 3 sts

1. K1, yo, k1, yo, k1

2 and all even. P

3. K2, yo, k1, yo, k2

5. K3, yo, k1, yo, k3

7. K4, yo, k1, yo, k4

9. K3, k2tog, k1, k2tog, k3

11. K2, k2tog, k1, k2tog, k2

13. K1, k2tog, k1, k2tog, k1

15. K2tog, k1, K2tog

17. Sl1k2togpsso

BO

Fasten off all ends and sew one to each side of large roses

4 responses to “ROSE BOUQUET BLANKET”

  1. Jay Avatar
    Jay

    should the only knit line be a purl line. Mine doesn’t look like yours

    Like

    1. Carry on Cate! Avatar

      Hi..do you mean in the blanket itself? It’s all knit in the round

      Like

      1. Jay Desai Avatar
        Jay Desai

        I misread the part of the round. All sorted. Can I check with the large flowers you still CO 24?

        Like

      2. Carry on Cate! Avatar

        No problem, and yes, both start with 24 sts but size is determined by how many rows are worked

        Like

Leave a comment

knitted gloves

knitted gloves

I decided to make some gloves as a gift for my mum. She’d seen the fingerless ones I was wearing and said she’d love some the same..except, not as chunky and with full fingers! Hmmm. Mine were rainbow gloves, very bright.

Anyway, I decided to go ahead and make them for Christmas so I took her out for the day, found a wool stall on a market and asked her to choose seven colours that I could use to make a jumper for one of my granddaughters. Little did she know they were for her gloves! 

I wrote the pattern as I went and here’s how I made them! If there are any errors, apologies, it’s from my scribbled notes

Rainbow gloves

Sizes: Medium

You will need:
DK yarn, 25g each of A – red, B – orange, C – yellow, D – green, E – blue, F – indigo and G – violet

One stitch marker

Waste yarn

Abbreviations

CO – cast on

PM – place marker

SM – slip marker

Sts – stitches

KFB – increase one stitch by knitting into the front and then the back of the same stitch

EOR – end of round

Rep – repeat

K2tog – knit two sts together

B & T – cut yarn and thread through all the sts, pull tight and fasten off

With colour A CO 44

PM and join to knit in the round

Rib K2, P2 for 10 rounds

Change to colour B and K2, P2 rib for another 10 rounds

Change to colour C

Next round – K5, KFB, K11, (KFB) 3 times, K to EOR

Knit 3 rounds

Thumb gusset

1.K22, PM, P1, K2, P1, PM, K to EOR

2.K to marker, SM, K1, KFB, K to 1st before marker, KFB, K to EOR

3.K to marker, P1, K to 1st before marker, P1, K to EOR

Rep rounds 2 & 3 until there are 18 sts between the makers changing to colour D after 3 more rounds ending after a round 3.  You should finish after 10 rounds in green.

Upper hand. Change to colour E

Next. K23, place 16 sts on waste yarn, K to EOR (46 sts)

Knit 10 rounds

Fingers – when putting sts on needles for fingers, divide evenly onto dpns and leave a long tail for sewing up.

Pinky – change to colour F

K6, place 34 sts on to waste yarn, cast on 2 sts then K6 sts to complete the round. Join to knit in the round. PM to mark BOR

K 19 rounds

Next round – (K2tog) rep to EOR

B & T

Ring finger – change to colour F.  Before knitting ring finger, pick up 2 sts in the cast on edge of the pinky finger

K7 sts from the waste yarn, CO 2 sts, leave next 24 sts on the waste yarn, K5 sts from the waste yarn, join to knit in the round, PM to mark BOR

Knit 23 rounds

Next round – (K2tog) rep to EOR

B & T

Middle finger – change to colour A. Before knitting ring finger, pick up 3 sts in the cast on edge of the pinky finger

K6 sts from the waste yarn, CO 3 sts, leave next 12 sts on the waste yarn, K6 sts from the waste yarn, join to knit in the round, PM to mark BOR

Knit 25 rounds

Next round – (K2tog) rep to EOR

B & T

Index finger – change to colour B

Place rem 12 sts onto needles, pick up 2 sts on cast on edge of middle finger, PM to mark BOR

K 23 rounds

Next round – (K2tog) rep to EOR

B & T

Thumb – change to colour E

Pick up 2 sts in the gap and join to work in the round.

Work 10 rounds

Next round – (K2tog) rep to EOR

B & T

Fasten off all ends, wash and dry flat

…and its done!

I’ve finished the beautiful yarn I was spinning. It’s from World of Wool. Its from their northern lights range a x named Blaze..very appropriate j think.

I’d hoped to spin it thin enough for 4ply…not quite got that..more a double knit thickness. Now…what to make with it??

Nativity all finished!

I’ve finished it and, if I may be so bold, I think it looks great!

What do you think? I’d love your feedback

We three Kings

The main cast, Mary, Joseph and baby Jesus

In order from the left…calf, Innkeeper, donkey, sheep and shepherd

Angel

And altogether!

The Nativity

I recently knit myself a chess set! I’ll add that separately. Then I decided to make a Nativity set..with about 6-7 weeks to go until Christmas!

I have been told, often, that I’m crackers, bonkers etc. I kind of agree

Anyway, I’ve knit all the pieces of all 12 characters…and I’ve now sewn together six of them…half way there. I can do this before Christmas..just need to construct a crib!

They’re bigger than I expected, each one, (bar the animals and baby Jesus) is around 7-8 inches tall!

The pattern is a purchased one by Knitting by Post and comes in two parts…well worth it. The instructions are clear and, as long as you keep the pieces separate, you’ll manage just fine.

The temperature project

Not a new pattern…that’s for next week..but I wanted to share a whole lot of socks I made.
I’m sure many of you have heard of temperature projects. The idea being that you make an item..scarf, blanket etc…over the period of a year. Each day you knit, or crochet, a specific number of rows determined by the daily temperature.
each potential temperature is given a colour e.g. 40-50 degrees might be green, or blue…or even red…whatever you want…generally very cold colours have various shades of blue changing to oranges and reds as the temperature rises. On average people use about 10 colours.

Anyway, I decided one year (I was turning 50), that I wanted to do something based on my year of birth! However, there was no data available online..it was too long ago! How to feel old in an instant! I emailed the met office and asked for their help. I explained what I was doing and asked if anyone could find any data for my year of birth. I didn’t expect much. Low and behold a lovely lady responded that, being intrigued by the project, she had gone into the depths of the met office and found the actual written pages for that year! Can you believe it? Anyway, she emailed me every single page with every bit of info I might possible want…so my project got underway.

It took me a while to do lots of calculations..(I’ve always said that knitting is just math)..but I finally got it all worked out and got knitting.

My temperature project was to knit a pair of socks for each month of the year I was born. One sock would show the high temperature, one the low. The heel cuff and toe would be the colour for the avaerage high or low temperature. I would end up with 12 pairs of matching/non matching socks..and I did it.
I love them so much I can’t bear to wear them for fear of wearing them out…at almost 54 they’ve sat in a box for almost 4 yrs but I still love them. I also kept all my working out!

Here they are..in all their glory.

The Pictures show the box of socks…several pairs ..and my intensive calculations!