Crochet Book Cover

My sister asked me if I knew how to make a book cover that she’d seen…I didn’t but said I’d give it a try!

So here it is! I’m using UK crochet terms

you will need:

any yarn and relevant sized crochet hook..e.g. dk yarn, 4mm hook

scissors, booking, stitch msrkers, a button

And a book!

start by making a magic ring..you can find really good tutorials online..(or alternatively chain 4, join with a slip stitch to make a circle and work from there)

Abbreviations

ch – chain

tr – treble

slst – slip stitch

Next: ch2, then 2 tr crochets into the magic circle (or ring), ch2, 3 tr crochet, ch2, 3 tr crochet, ch2, 3 tr crochet, ch2, sister into the top of the original ch2.

next: ch2, then (tr crochet into the top of the next 2 treble crochets up to the ch2 space. Tr crochet into the ch space, chain 2, tr crochet into the chain space) repeat another 3 times. Slst to top of the first ch2.

you should now have 4 ch spaces with 5 tr crochets between each one.

continue in this manner, increasing the number of tr crochets between the ch spaces by two each round.

the size of the book you want to cover will determine how many rounds you will need.

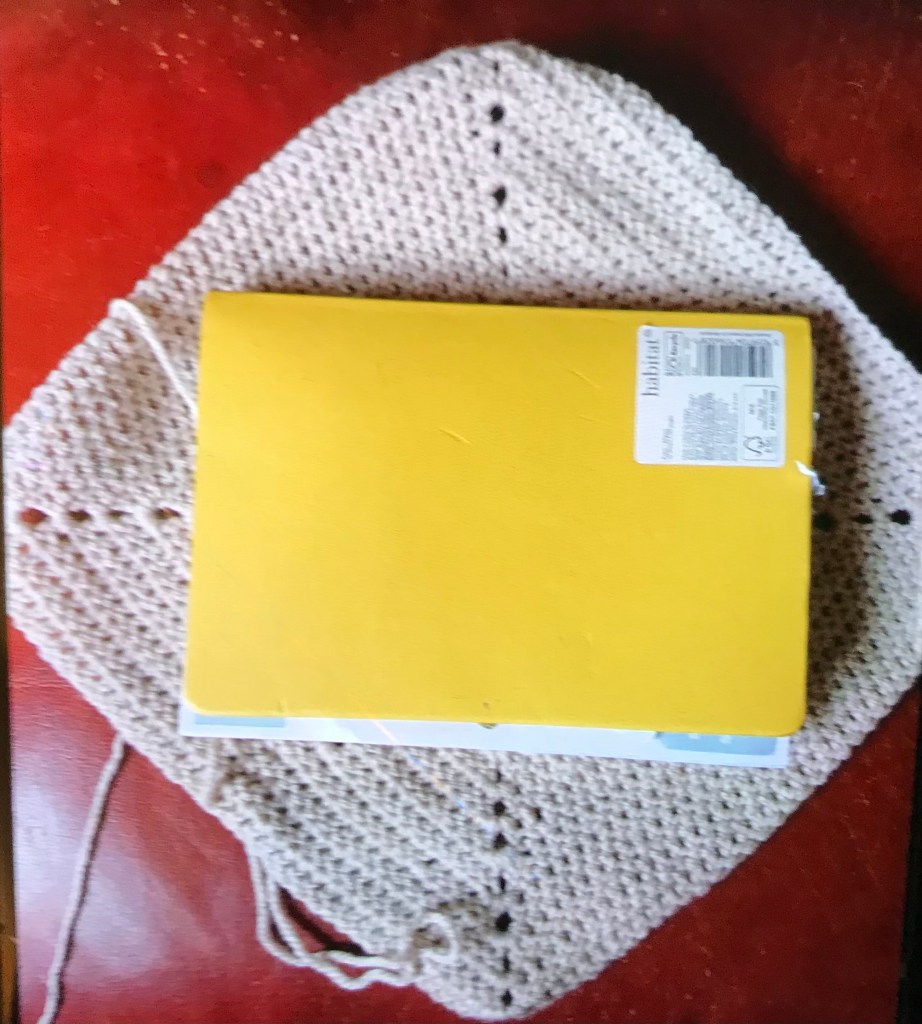
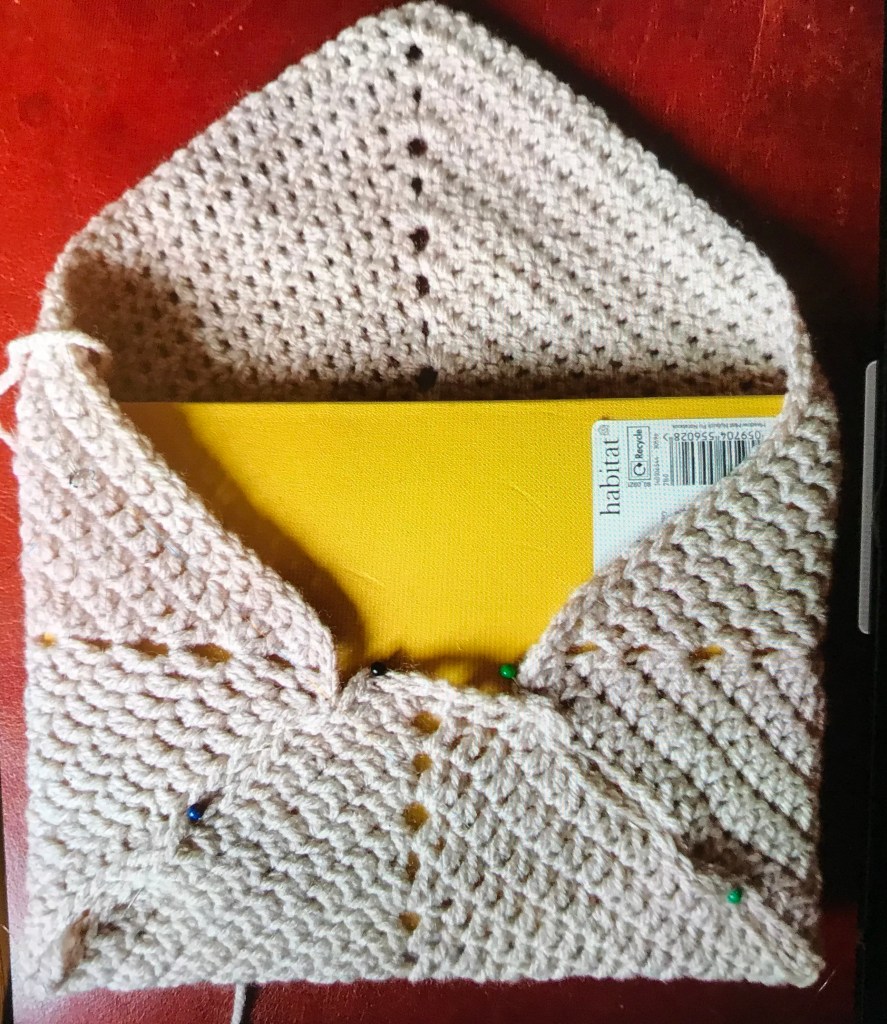
To check if it’s large enough I placed the book on the cover as below. Fold the bottom three corners as shown and crochet the two edges together with slip stitches or, alternatively, sew together, on either side as shown.

Next, using the same yarn, or another colour if you prefer, make the scalloped edge..

Ch 1, sc in same st. (skip 2 sts, 5 dc in st, skip 2 sts, 1 sc in st). Rep all the way across to the other side of the envelope fold over. If, when you get to the point, it doesn’t quite fit..e.g. the scallop wouldn’t be either immediately at the top or eveni

lay either side, I reduced the number of sts I left between skipping just one stitch at times, in order to ensure an even scallop either side or at the point if that makes sense.

once you’ve fastened off all ends, sew on a button where the point would land and you’re done.

The book should be quite a snug fit

knitted gloves

knitted gloves

I decided to make some gloves as a gift for my mum. She’d seen the fingerless ones I was wearing and said she’d love some the same..except, not as chunky and with full fingers! Hmmm. Mine were rainbow gloves, very bright.

Anyway, I decided to go ahead and make them for Christmas so I took her out for the day, found a wool stall on a market and asked her to choose seven colours that I could use to make a jumper for one of my granddaughters. Little did she know they were for her gloves! 

I wrote the pattern as I went and here’s how I made them! If there are any errors, apologies, it’s from my scribbled notes

Rainbow gloves

Sizes: Medium

You will need:
DK yarn, 25g each of A – red, B – orange, C – yellow, D – green, E – blue, F – indigo and G – violet

One stitch marker

Waste yarn

Abbreviations

CO – cast on

PM – place marker

SM – slip marker

Sts – stitches

KFB – increase one stitch by knitting into the front and then the back of the same stitch

EOR – end of round

Rep – repeat

K2tog – knit two sts together

B & T – cut yarn and thread through all the sts, pull tight and fasten off

With colour A CO 44

PM and join to knit in the round

Rib K2, P2 for 10 rounds

Change to colour B and K2, P2 rib for another 10 rounds

Change to colour C

Next round – K5, KFB, K11, (KFB) 3 times, K to EOR

Knit 3 rounds

Thumb gusset

1.K22, PM, P1, K2, P1, PM, K to EOR

2.K to marker, SM, K1, KFB, K to 1st before marker, KFB, K to EOR

3.K to marker, P1, K to 1st before marker, P1, K to EOR

Rep rounds 2 & 3 until there are 18 sts between the makers changing to colour D after 3 more rounds ending after a round 3.  You should finish after 10 rounds in green.

Upper hand. Change to colour E

Next. K23, place 16 sts on waste yarn, K to EOR (46 sts)

Knit 10 rounds

Fingers – when putting sts on needles for fingers, divide evenly onto dpns and leave a long tail for sewing up.

Pinky – change to colour F

K6, place 34 sts on to waste yarn, cast on 2 sts then K6 sts to complete the round. Join to knit in the round. PM to mark BOR

K 19 rounds

Next round – (K2tog) rep to EOR

B & T

Ring finger – change to colour F.  Before knitting ring finger, pick up 2 sts in the cast on edge of the pinky finger

K7 sts from the waste yarn, CO 2 sts, leave next 24 sts on the waste yarn, K5 sts from the waste yarn, join to knit in the round, PM to mark BOR

Knit 23 rounds

Next round – (K2tog) rep to EOR

B & T

Middle finger – change to colour A. Before knitting ring finger, pick up 3 sts in the cast on edge of the pinky finger

K6 sts from the waste yarn, CO 3 sts, leave next 12 sts on the waste yarn, K6 sts from the waste yarn, join to knit in the round, PM to mark BOR

Knit 25 rounds

Next round – (K2tog) rep to EOR

B & T

Index finger – change to colour B

Place rem 12 sts onto needles, pick up 2 sts on cast on edge of middle finger, PM to mark BOR

K 23 rounds

Next round – (K2tog) rep to EOR

B & T

Thumb – change to colour E

Pick up 2 sts in the gap and join to work in the round.

Work 10 rounds

Next round – (K2tog) rep to EOR

B & T

Fasten off all ends, wash and dry flat